Harry Potter Mug
Time: A couple hours
Materials: A glass mug, Americana Crystal Gloss Enamels glass paint (black and white),
a sharpie, an oven
I am a huge Harry Potter fan so I was really excited to make this mug. This was a super fun project that I made for one of my friends for her birthday. It was quick and easy, and the best part is that the mug is completely usable and dishwasher safe!
I formed the idea when I was looking online for things to make or get for my friend for her birthday so I was looking at Harry Potter and The Lord of the Rings trinkets when I came across a couple different really cool Harry Potter mugs that people had made and I thought, "I could totally do that!" However making mugs is a bit tricky especially if you want to be able to use them! The safest bet as far as I can tell is to buy specific ceramic or glass paint that says it is dishwasher safe after you bake it in the oven. Unfortunately I have yet to find such a paint that also says it is safe to use on the food/drink side of the surface, and I really wanted to stipple a grim on the bottom of the cup which is why I ended up going for a glass cup rather than a ceramic one.
Though I messed up in a couple parts because I was getting used to using the paints, I am overall really happy with this mug (and I hope my friend enjoys it as well! :D ) and I am definitely going to make more mugs or similar things in the future!!! (Already bought four more colors of the Americana Crystal Gloss Enamels paints!!!) [Even though making mugs is a little too close to the 'crafty' realm rather than the 'artsy' realm for my comfort sometimes since I really am not particularly 'crafty'...]
Anyways, here's a super detailed look at how I made the mug!!!
Original sketch for the mug. I was literally going to write our 'Harry Potter' in Harry Potter font which would've been kind of a pain so I'm really glad I didn't do that!
I was originally planning on putting this on the handle (depending on how big the handle of the mug I was going to buy was) but instead I decided to write my friend's name on the handle to make it more personalized.
Looking at pictures on the internet, I sketched out a silhouette of the Hogwarts castle on a strip of paper that would reach half-way around the cup so I could draw the castle twice. Then I taped the paper down to the cup so I could trace the drawing.
This is what the inside looks like with the paper taped on. Notice I had to trace the outline of the castle to the other side of the paper so I could see it better. I am actually tracing the castle backwards so that it will be forwards on the outside.
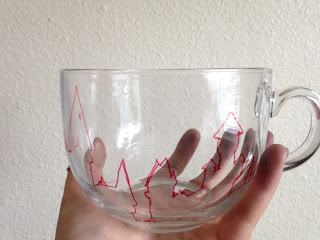
Here's after I traced it. I used a red sharpie so that it would be easier to see when using black paint. Note: the glass warps the drawing quite a bit so it's important to make sure what you're tracing still looks good even if it doesn't exactly match the original sketch.
Here's the first castle completely traced.
Here it is with both castles and a sketch of the grim on the bottom. Note: All of the sharpie is on the inside of the glass so that you can see it when you paint on the outside of the glass (since you can't paint on the inside of the glass at all since the paint isn't supposed to be in contact with food or drink).
These were my sketches for the symbols I wanted going around the cup. I wanted 8 symbols: the seven horcruxes (Book, Ring, Locket, Cup, Diadem, Snake, Harry), and the Deathly Hallows symbol.
Here's everything fully painted. Notice I am wearing gloves because if any oil gets on the outside of the cup underneath the paint then all of the paint will chip off. You have to wipe the whole thing down with rubbing alcohol before you start painting.
Sirius!!! <3 (but jk, it's the actual grim)
The cup has to dry for like four days before you bake it. I had to keep it upside down since there was paint on the bottom. Notice I also wiped off the sharpie from the inside using rubbing alcohol.
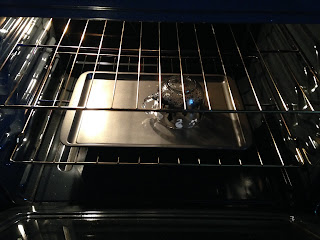
After 4 days you bake it at 275 degrees Fahrenheit for 30 minutes.
And it's done!!! :D


No comments:
Post a Comment