Pages

Wednesday, December 28, 2016

Fan Art 1: Queen's Thief - Costis & Aris

Costis & Aris
Based off of characters from The King of Attolia by Megan Whalen Turner
Medium: Digital
Time: A couple days
Date: June 2016

Other Fan Art for the same series: Sea of Olives

This was a fan art I did a couple of months ago for the Hamiathes' Gift Exchange on the lovely Sounis fan site. I was super excited for the exchange, and I had a bunch of ideas that I wanted to draw, but alas I was finishing my hectic last couple of weeks studying abroad in Italy and thus I did not complete the more ambitious of my planned fan art (which I have since been finishing up and will be posting shortly!). I did however complete this lovely little drawing of Costis and Aris who are predominately from The King of Attolia (Book 3) in Megan Whalen Turner's Queen's Thief series.

[Quick Note: The Queen's Thief series (the actual official series title now { ;) } is absolutely my favorite book series of all time, and Megan Whalen Turner is a wizard of an author. I can no longer remember my life pre-Queen's-Thief series. They are the most amazing work of literary art I have ever come across, and as an author I can only aspire to be half as amazing as Megan Whalen Turner. This is the sort of books series where every single word has a meaning and a purpose revealing more with each reread (yes, even many many rereads later), but they can also be enjoyable on a surface level without delving into the hidden treasures of extra meaning and foreshadowing. The characters are wonderful and a joy to read. The books are a perfect balance of everything a book needs but done in such a masterful way that I consider them more a work of art than a mere book series (mind you these are children's/young adult fiction and written in a modern style {as opposed to the more antiquated style of most of the greats of children's/teen literature} so that really is saying something). I could literally write a whole series raving about how amazing each book is, so I had better get on to my fan art~~~]

Prompt: The prompt I worked off of was from a lovely fellow fan who adored Costis and Aris and their friendship [or a little bit more ;) ]. Throughout The King of Attolia, which is narrated from Costis's point of view, there are several scenes with long time friends Costis and Aris. There is everything from them doing their normal daily duties as guards, hanging out in their free time, worrying about each other (such as when Costis desperately has to plead the King for a way to save Aris), etc. Costis is very just, upstanding, and passionate. He comes from a landed family which is huge as far as status goes in Attolia. Aris does not come from a landed family and cannot afford to be as upright as Costis sometimes. They stay friends through thick and thin despite their difference in status or the trouble they find themselves in throughout the plot of the book.

This is my initial sketch. I wanted Costis (on the left) to be standing openly and reaching up around Aris's neck without care for how awkward the reach or how cumbersome the armor he was wearing. I wanted to witness them spontaneously having fun: Costis, a more genuine and open fun with his best friend; Aris, a more precious fun grateful for the friendship he's found in Costis. I was also working on the design of the armor which needed to both feel like Greek/Roman-ish armor, but also be plenty decorative since as Queen's Guard they were expected to look both impressive and perhaps just a bit ornamental. The symbol on the chest plate was meant to be the lily of Attolia which is mentioned to be on Attolian currency.

This is my completed sketch (in pencil). Costis is smiling unreservedly. There's a bit of funkiness going on in some of the hands and elbows, but the armor looks nice. I also added a second lily on the hip plate.


I decided that I was going to turn this into a digital drawing to keep it cleaner, and besides I think I only had 12 colored pencils with me in Italy and no other art supplies. This is the black and white digital version of the drawing. I decided that I was going to keep it 'sketch-y' and stay simple on the coloring, with more muted, everyday-happy sorts of colors. I wanted a simple clean fill in that maintained the feelings of my sketch.

I wanted both of their hair to be dark brown, but I didn't want them to be the same color. I wanted to give Costis a slight red tinge to his hair (since for some reason I related reddish hair with warmer, more open personalities - not that Costis is that 'warm' per se, but he is very genuine to his feelings and beliefs as opposed to Aris being slightly more reserved and constrained.). I do wish I would have made Costis's hair curlier, but curly hair is hard. 
This is the final drawing with highlights and shadows added. I also darkened Aris's hair a bit, and cleaned up some of the dark sketch-y areas a little. I made the horrible elbow a bit less horrible. There is definitely a lot more I would have done, especially now that I know a bit more about making digital art, but overall I am happy with it and it makes me smile every time I see it :) .

One other note about this pic, where I wanted Costis to have spontaneously slung his arm around Aris, Aris in turn is gripping Costis's shoulder. Though he can't afford to be as impulsive in his actions as Costis, they have an equal, comfortable friendship, that is important to both of them.

I know this is a cheesy over-analysis of one little sketch-y picture, but it goes to show how much I love this series and it's characters, and how even when I'm only making a tiny little sketch-y picture there is so much that I am thinking about and that I want to include to do justice to my some of my favorite characters~~~

Other Ideas:

Below is one of my other ideas for a drawing of Costis and Aris. This one was supposed to be them hanging out in Costis's room when off duty. I really liked the idea, but I had a lot of dimensional issues, so if I do end up completing this some day I will likely just have to start over.
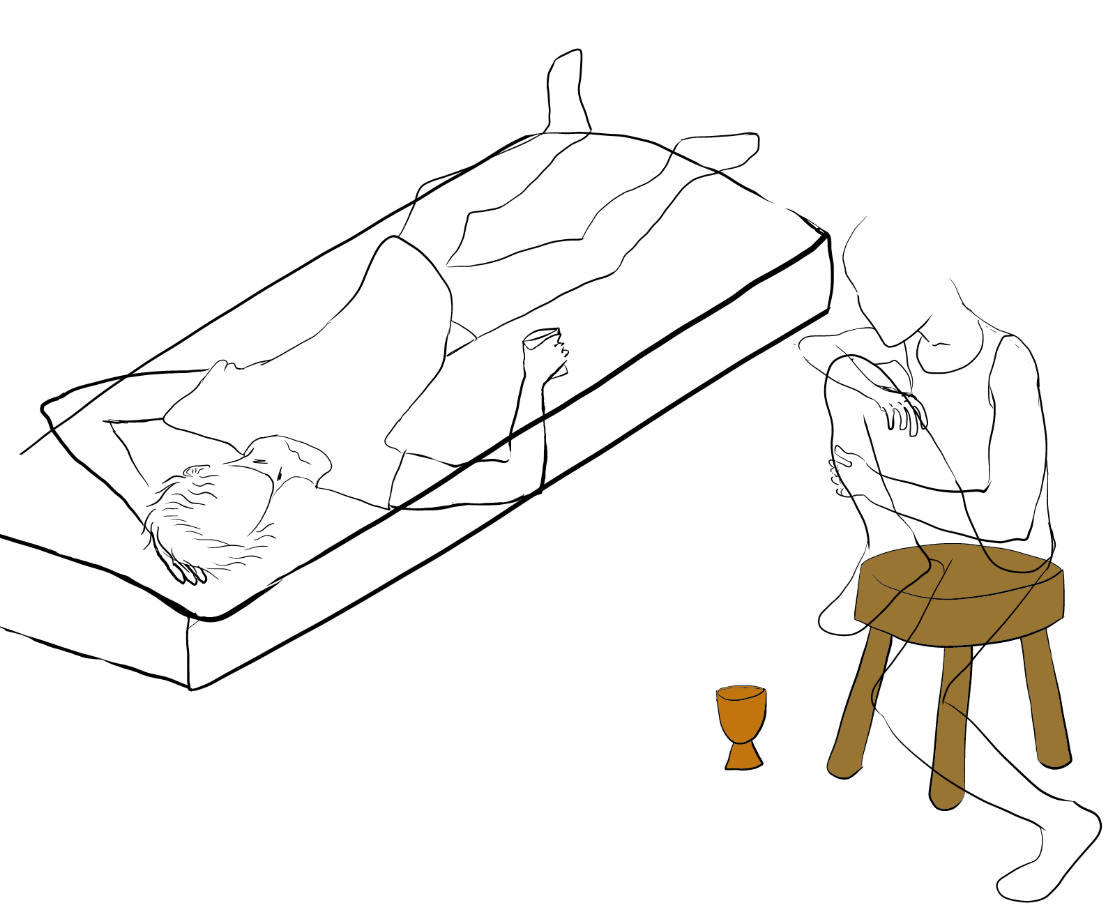
One other idea I had was more of a comic of them eating in the mess hall - starting with when they were younger and became friends (when Costis didn't care about being friends with someone of lower status) and later throughout the plot of the book (for example there was a scene when Costis was ostracized and Aris decided to throw his lot in with him and sit with him anyways). I might still do this eventually~~~

Darn, I should've known that I couldn't keep a fan art post for the Queen's Thief series short and sweet and to the point.

Tuesday, December 13, 2016

Video Game Art 1: Platform Concept and Sprites

Platformer Video Game
Time: Around a month

I recently took a class in Java/C++ object oriented design and I was really excited because one of our main projects was to design a platform game! Of course I volunteered to make all of our sprites and everything :D - This was super fun! There was so much more that I wanted to do with it, but I am still pretty happy with everything and I have learned a lot. I definitely would have done a lot of things differently, and I wish I would have had more time to make the game more unique and have more of a cohesive design, but now I have a better idea of how to go about things next time ;)

Also I wanted to mention that I made most of the sound effects too which was super fun and totally outside of my spectrum of abilities. But the thing that made the game THE BEST was of course the music! Because of how the code was made I needed a MIDI file and couldn't figure out how to make one, so my super awesome beast brother composed a short looping file for me (check out his music website or his soundcloud)! He's the BEST! The music he made for my game sounds totally outer space jazz lounge and I really wanted to redo the background to make it more lounge-y and create different items that could be placed into the game, but alas the time of a college student is limited so I will have to leave all these ideas for the next game [which will be a lot more professional and actually have a plot and everything - the main point of this project was basically just to get all of the proper functionality]

Concept:

Our original concept was going to be the sort of game where everything seems cute and happy and then suddenly shifts to being evil. We wanted our protagonist to be a normal looking person who for whatever reason ended up in this situation.

Background:


Since the platformer game scrolls across the screen, I wanted the background to start super happy/light/harmless, but at the end I wanted the level to look like absolute chaos/terror/destruction. I ended up making a much more simplified version of my concept with just a simple rainbow for the first half of the level and then a scary volcano at the end.

TNT and Gas Blocks:


The TNT blocks subtract 20 health and the gas blocks keep the character from shooting for a set amount of time. The regular blocks came with the sample skeleton code we were modifying from here so I had a lot of fun using that basic design to create the TNT and gas blocks. For some reason the RED block with TNT written across it was not obviously enough a bomb because out of the two of my friends who I had play my game, both of them would purposefully hit the block thinking it gave them points or something. Oh well...

Main character design:


We wanted the main character to be a bit unobtrusive. I will probably make another quick post specifically about his design once I get my other computer back and running because I had some fun concepts for him and his full sized artwork had a lot more to it than the little sprite we ended up using. I really wanted him to have big boots, and I love it.

Happy Creature Design:


This is what the main enemy creature looks like, bouncing up and down before he sees the main protagonist, gets angry, and begins his attack.

Angry Creature Design:


This is the main enemy creature in his attack mode. I wanted him to look a bit psycho. I loved the slight sketchiness to his style as opposed to the 'cleanness' of his cute version.


Dying Creature Design:

This is the short animation that plays after the angry creature has died. All I did was distort and darken the 'angry' sprites. He sort of shrivels away, and it is absolutely awesome. One thing that was really cool is that a 'star' in our game makes the main character invincible, so I have created levels with just a line of enemies and periodic stars so you can literally just run straight through and kill all of the creatures and they do like this domino effect of dying animations.

More Screenshots:

Angry enemy attacks

Star cave and mushroom garden

Hiding from the enemy

Well that's all for now! I can't believe this is my first post in over a year. I have a couple projects (and hopefully some more crochet patterns) I've been meaning to write about so hopefully over Christmas break I will be able to make a lot of updates!


Saturday, May 30, 2015

Other Art 7: Harry Potter Mug

Harry Potter Mug
Time: A couple hours
Materials: A glass mug, Americana Crystal Gloss Enamels glass paint (black and white), 
a sharpie, an oven

I am a huge Harry Potter fan so I was really excited to make this mug. This was a super fun project that I made for one of my friends for her birthday. It was quick and easy, and the best part is that the mug is completely usable and dishwasher safe!

I formed the idea when I was looking online for things to make or get for my friend for her birthday so I was looking at Harry Potter and The Lord of the Rings trinkets when I came across a couple different really cool Harry Potter mugs that people had made and I thought, "I could totally do that!" However making mugs is a bit tricky especially if you want to be able to use them! The safest bet as far as I can tell is to buy specific ceramic or glass paint that says it is dishwasher safe after you bake it in the oven. Unfortunately I have yet to find such a paint that also says it is safe to use on the food/drink side of the surface, and I really wanted to stipple a grim on the bottom of the cup which is why I ended up going for a glass cup rather than a ceramic one.

Though I messed up in a couple parts because I was getting used to using the paints, I am overall really happy with this mug (and I hope my friend enjoys it as well! :D ) and I am definitely going to make more mugs or similar things in the future!!! (Already bought four more colors of the Americana Crystal Gloss Enamels paints!!!) [Even though making mugs is a little too close to the 'crafty' realm rather than the 'artsy' realm for my comfort sometimes since I really am not particularly 'crafty'...]

Anyways, here's a super detailed look at how I made the mug!!!

Original sketch for the mug. I was literally going to write our 'Harry Potter' in Harry Potter font which would've been kind of a pain so I'm really glad I didn't do that!

I was originally planning on putting this on the handle (depending on how big the handle of the mug I was going to buy was) but instead I decided to write my friend's name on the handle to make it more personalized.

Looking at pictures on the internet, I sketched out a silhouette of the Hogwarts castle on a strip of paper that would reach half-way around the cup so I could draw the castle twice. Then I taped the paper down to the cup so I could trace the drawing.

This is what the inside looks like with the paper taped on. Notice I had to trace the outline of the castle to the other side of the paper so I could see it better. I am actually tracing the castle backwards so that it will be forwards on the outside.

Here's after I traced it. I used a red sharpie so that it would be easier to see when using black paint. Note: the glass warps the drawing quite a bit so it's important to make sure what you're tracing still looks good even if it doesn't exactly match the original sketch.

Here's the first castle completely traced.

Here it is with both castles and a sketch of the grim on the bottom. Note: All of the sharpie is on the inside of the glass so that you can see it when you paint on the outside of the glass (since you can't paint on the inside of the glass at all since the paint isn't supposed to be in contact with food or drink).

These were my sketches for the symbols I wanted going around the cup. I wanted 8 symbols: the seven horcruxes (Book, Ring, Locket, Cup, Diadem, Snake, Harry), and the Deathly Hallows symbol.

Here's everything fully painted. Notice I am wearing gloves because if any oil gets on the outside of the cup underneath the paint then all of the paint will chip off. You have to wipe the whole thing down with rubbing alcohol before you start painting.


Sirius!!! <3 (but jk, it's the actual grim)

The cup has to dry for like four days before you bake it. I had to keep it upside down since there was paint on the bottom. Notice I also wiped off the sharpie from the inside using rubbing alcohol.

After 4 days you bake it at 275 degrees Fahrenheit for 30 minutes.


And it's done!!! :D